
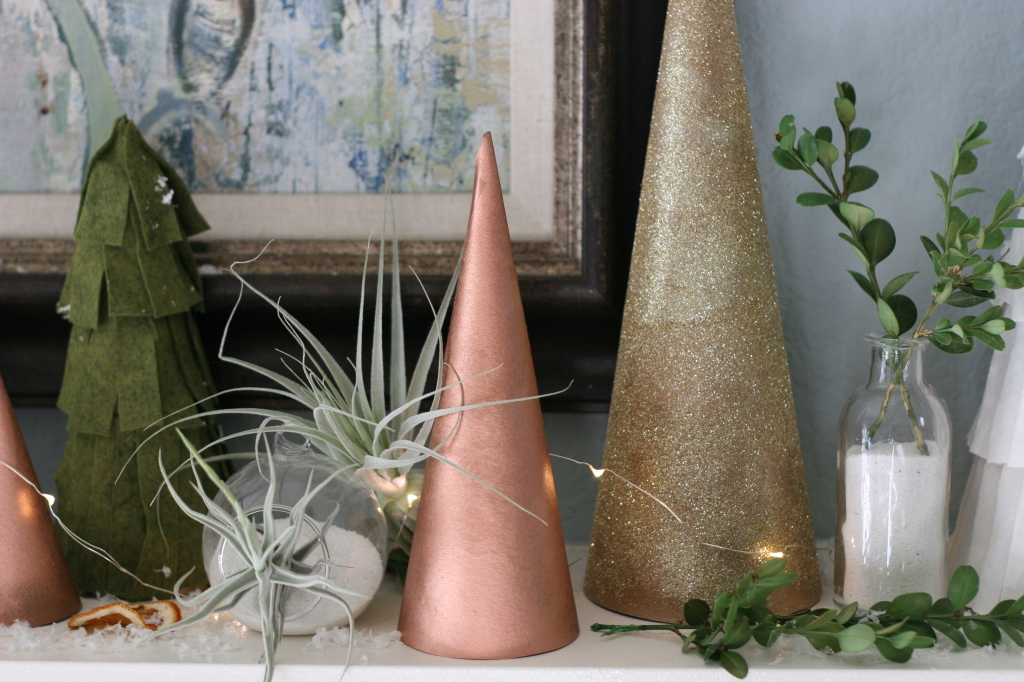
Metallic Lights Mantel

I accidentally decorated my mantel for Christmas. It wasn't intentional. Honest! I try to wait until after Thanksgiving before moving on to my Christmas decor, but once I started making these pretty metallic and felt paper Christmas cone trees, I couldn't stop. What I love about this project is anyone can do it, and the materials are easily accessible. Paper, glue, spray paint, and some felt and glitter if you so desire. In this case, the more the merrier is definitely true. One tree isn't enough - you need a forest! I also love that this could easily be modified as a kid's craft. Before making the cone, have your child decorate it with whatever you have on hand - stickers, glitter, even a traced handprint would be adorable. After they have it all fixed up, you can make the cone. Done!
For this craft, you need the following:
- Sturdy craft paper (scrapbook paper would probably work, too)
- Glue and tape
- A makeshift compass consisting of needle, string, and chalk
- Metallic spray paint in copper, silver, and/or gold (I found these at OSH)
- Adhesive spray and glitter (optional, of course)
- White and/or green felt (also optional - you could skip the felt entirely and just stick with the metallic and glitter cones)

Step 1: Cut a large circle out of craft paper. The radius of your circle will equal the height of the tree. You can create a makeshift compass by threading a needle and putting it through the center of the craft paper. Tie chalk (or a pencil) to the edge, make the string taut, and draw your circle. Cut it out carefully. (Question: Whenever I start a project, my cat comes a runnin' to plop herself down on what I'm working on. Anyone else have this problem? My solution was to make Calla her own craft paper circle. That worked for about two minutes.)
Step 2: Cut your circle into thirds so you have three even pieces. If you want it perfect, you can follow this tutorial, or you can eye-ball it, then fold each third in half and make sure the arcs are lined up evenly.
Step 3: Repeat steps 1 and 2 with two more circles of different radius lengths. You'll then end up with 9 trees of three different heights.
Step 4: Take one of the pieces. The tip is the top of the cone. Start there and fold in at the point, creating the cone shape. Line up the base of the cone, then stick a piece of tape or two to secure. The paper will definitely overlap, and that's okay! It will make the cone more secure. Do this with each piece.

Step 5: Hot glue the edge of the cone, both inside and out. Trim up the base if it's wobbly in any way. That's it! Your cones are finished!
Step 6: To make metallic cones, simply spray paint the cone and let dry. Easy peasy!
Step 7: To make glitter cones, spray with adhesive (or spray paint) and dust with glitter.
Step 8: To make felt cones, cut a pile of felt into squares or rectangles, depending on what you want. If you're using the squares, you'll position them to look like diamonds with the points facing toward the top and base. The side edges will overlap so there are no gaps, and the tops will somewhat fit into the point created. If you're using the rectangles, you'll start by gluing one, then overlapping another right next to it so that the whole cone is covered. Either way, start from the bottom and work your way up to the top. Trim the squares or rectangles to be a bit smaller once you're at the top layer or so. Once you're all finished, go in and add extra glue to make the felt lay nicely.

On my mantel, I added a few pieces to make the whole thing full and fun. To create the look, you need:
- A string of battery-powered lights
- Air plants
- A few small glass vases or globes filled with sand (to look like snow!)
- Preserved or artificial boxwood
- Dried orange rounds (tutorial here)
- Artificial snow


Comments
Post a Comment